Customizing Finder for Efficient File Management
Optimizing Finder settings on your macOS can significantly improve your file management efficiency. Here are some detailed steps to customize Finder for a more streamlined and productive workflow:
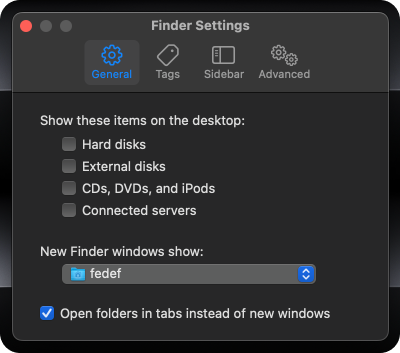
1. Disable All Items on the Desktop
- Why: A clutter-free desktop reduces distractions and can improve system performance. It also ensures a cleaner and more organized workspace.
- How: Open Finder preferences (
Finder > PreferencesorCommand + ,), go to theGeneraltab, and uncheck all the items underShow these items on the desktop.
2. Set New Finder Windows to Open the Home Folder
- Why: Opening new Finder windows to the Home folder provides quick access to your personal files and folders, making navigation more efficient.
- How: In Finder preferences, under the
Generaltab, setNew Finder windows showto your Home folder.
3. Enable Tabbed Browsing
- Why: Tabbed browsing allows you to keep multiple folders open within a single Finder window, reducing window clutter and making it easier to manage multiple files and folders simultaneously.
- How: Open Finder, then go to
File > New Tab(or useCommand + T) to start using tabs. You can drag and drop files between tabs easily.
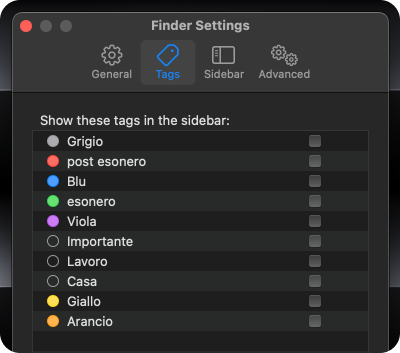
4. Disable All Tags
- Why: Disabling tags can simplify your Finder sidebar and reduce visual clutter, helping you focus on more relevant folders and files.
- How: In Finder preferences, go to the
Tagstab and uncheck all the tags listed.
5. Customize the Finder Sidebar
- Why: A customized sidebar with only the most frequently used folders and locations enhances navigation efficiency.
- How: In Finder preferences, under the
Sidebartab, check or uncheck the items you want to show or hide in the sidebar. Drag and drop folders to and from the sidebar to customize it further.
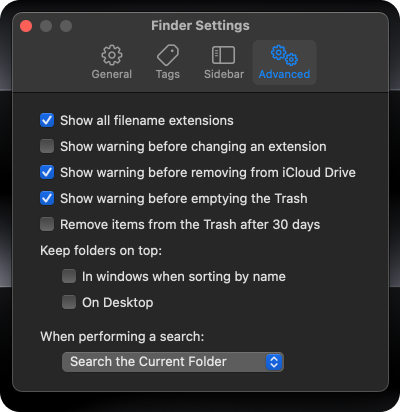
6. Adjust Advanced Settings for Search and Warnings
- Why: Fine-tuning these settings can make Finder behave more predictably according to your workflow and reduce unnecessary interruptions.
- How: In Finder preferences, go to the
Advancedtab. Set theWhen performing a searchoption to your preference (e.g.,Search the Current Folder). You can also enable or disable warnings for changing file extensions, emptying the Trash, and removing items from iCloud Drive.
7. Enable Path Bar and Status Bar
- Why: The Path Bar shows the full path of the current folder, making navigation easier, while the Status Bar provides useful information like the number of items in a folder and available disk space.
- How: In Finder, go to
Viewand selectShow Path BarandShow Status Bar. The Path Bar will appear at the bottom of Finder windows, showing the folder hierarchy, and the Status Bar will display additional information.
8. Additional Tips for Finder Efficiency
-
Use Smart Folders:
- Create Smart Folders to automatically organize files based on specific criteria. This can save time when searching for files with certain attributes.
-
Leverage Quick Actions:
- Use Quick Actions (available in the Finder's Preview pane) to perform common tasks like rotating images, creating PDFs, and marking up files directly from Finder.
-
Utilize Keyboard Shortcuts:
- Learn and use keyboard shortcuts for common Finder actions. For example, use
Command + Nfor a new Finder window,Command + Shift + Nto create a new folder, andCommand + Option + Spaceto open a new Finder search window.
- Learn and use keyboard shortcuts for common Finder actions. For example, use
By customizing Finder settings and using these additional tips, you can significantly enhance your file management efficiency and create a more productive working environment on your Mac.